
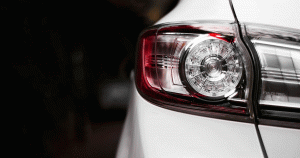
 A broken tail light may seem like something you should let a professional handle — especially on newer models, whose designs make the screws a bit harder to find. However, replacing a broken tail light is something you can easily do yourself. Here’s how:
Before You Start
First, of course, you will need to purchase the replacement lens. In terms of actual tools, what you need is minimal. Just have a socket wrench, screwdriver, and crowbar on hand. All of these are good things to keep in your car anyway since they will come in handy in a variety of emergency situations.
The ideal location for this repair would be your home garage, but that may not always be possible. If you are changing the tail light during a trip, try to find a covered spot away from moving cars. Otherwise, rain may force you to stop in the middle of the repair — and you don’t want that. Make sure to employ the emergency brake if you park on an incline, and use road flares and reflective cones at night.
Finally, remember to be firm but gentle during the removal and installation process. Force will be required, but too much can lead to broken pieces and ripped wires.
Step-By-Step
- Turn off the vehicle. This will eliminate the possibility of electric shock.
- Remove the fasteners. In older vehicles, you may find the screws on the outside of the vehicle. To achieve a seamless look, newer models typically place the screws somewhere less visible, such as in the trunk area. Depending on the type of fastener, you will either need a wrench or a screwdriver for this step.
- Twist out the bulb socket. This only requires a quarter turn counterclockwise and should release the tail light assembly.
- Separate the tail light assembly from the vehicle. This may require a good bit of force; you may need to use both hands or even a crowbar on some models.
- Remove the old lens. There will probably be a few screws or thumb nuts holding it in place.
- Insert the new lens. Remember to secure it in place with whatever fasteners held the old lens.
- Reinstall the tail light assembly. Twist the bulb socket clockwise until it locks into place and secure the tail light assembly with any screws or fasteners you removed earlier.
Once you’re finished, be sure to test the tail light to make sure it is working properly before you get back on the road.
Video Tutorials
If you’re a visual learner, you may prefer to watch a video tutorial before attempting this yourself. In that case, it’s best to key your search to the specific model you own. For instance, you can find a video tutorial for replacing the tail light lens on a 2013 Toyota Camry on YouTube. Other users have posted similar videos for their own vehicles.
Next time you need to replace a broken tail light, skip the expensive visit to a mechanic. Instead, follow the steps above to complete this repair yourself.
Image via Pixabay
Connect with us


Recent Blog Entries
- A Considered Approach to Pre-Owned Toyota Ownership
- Toyota SUVs Maintenance Benefits: What Drivers in Kingsport, TN Need to Know
- Trading In at a Toyota Dealership Feels Less Like Work
- Keeping Your Toyota Truck Doing What It Was Built Do
- Discover Toyota Certified Collision Center Benefits in Kingsport, TN